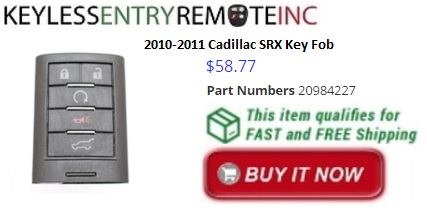
ORDER THIS KEY FOB PART NUMBER HERE: 13502537 or 20984227
Programming Instructions:
You have one programmed remote and you want to add another.
1. Vehicle must be off.
2. Place the working remote(s) in the cup-holder. Have the new remote with you.
3. Insert the key into the key lock cylinder located on the outside of driver’s door.
4. Turn the key to the unlock position five times within ten seconds.
5. The (DIC) Driver Information Center displays Ready to Learn Electronic key #2, 3, 4 ETC.
6. Place the new remote into the transmitter pocket with the buttons facing the front
of the vehicle. (The transmitter pocket is inside the center console between the
driver and front passenger seats). The storage area will need to be opened and the
storage tray lifted up to access the transmitter pocket.
of the vehicle. (The transmitter pocket is inside the center console between the
driver and front passenger seats). The storage area will need to be opened and the
storage tray lifted up to access the transmitter pocket.
7. Press the ignition. When the remote is learned the DIC display will show that it is
ready to program the next remote.
ready to program the next remote.
8. Remove the remote from the transmitter pocket and press unlock on the remote.
9. To program additional remotes, repeat Steps 6 through 8.
10. When all additional transmitters are programmed, press and hold the ignition for
ten seconds to exit programming mode.
ten seconds to exit programming mode.
You have no working remotes.
1. The vehicle must be off.
2. Insert the key into the key lock cylinder located on the outside of driver’s door.
3. Turn the key to the unlock position five times within ten seconds.
4. The (DIC) Driver Information Center displays REMOTE LEARN PENDING, PLEASE WAIT.
5. Wait for ten minutes until the DIC displays PRESS ENGINE START BUTTON TO LEARN
and then press the ignition.
The DIC displays will again show REMOTE LEARN PENDING, PLEASE WAIT.
and then press the ignition.
The DIC displays will again show REMOTE LEARN PENDING, PLEASE WAIT.
6. Repeat Step 5 two additional times. After the third time all previously known remotes will
no longer work with the vehicle. Remaining remotes can be relearned during the next steps.
The DIC display should now show READY FOR REMOTE #1
no longer work with the vehicle. Remaining remotes can be relearned during the next steps.
The DIC display should now show READY FOR REMOTE #1
7. Place the new remote into the transmitter pocket with the buttons facing the front
of the vehicle. (The transmitter pocket is inside the center console between the
driver and front passenger seats). The storage area will need to be opened and the
storage tray lifted up to access the transmitter pocket.
of the vehicle. (The transmitter pocket is inside the center console between the
driver and front passenger seats). The storage area will need to be opened and the
storage tray lifted up to access the transmitter pocket.
8. Press the ignition. When the remote is learned the DIC display will show that it is
ready to program the next remote.
ready to program the next remote.
9. Remove the remote from the transmitter pocket and press unlock on the remote.
10. To program additional remotes, repeat Steps 7 through 9.
11. When all additional transmitters are programmed, press and hold the ignition for
ten seconds to exit programming mode.
ten seconds to exit programming mode.
Having trouble programming the remote or just want a professional to program the remote for you? Enter your city or zip code in the search box below to find a professional key fob installer in your area.
ENTER YOUR CITY NAME TO FIND A
PROFESSIONAL KEY FOB INSTALLER NEAR YOU
By Keyless Entry Remote Inc
